Smart Solutions
That Lead to Success
Specializing in the automation of business processes through the use of Artificial Intelligence.
Smart Automation Systems
With our hardworking team and our data analytics and data science services, we can help your company track and manage personalized leads, email marketing and data improvements aligned with your company's current data.

Discover how to reach your audience in an automated way.
PressOne is a powerful platform that will quickly put you in contact with a large volume of customers to offer you outstanding options for your company’s products or services.

Need SIP Trunks for 3CX, Vicidial, or your VOIP Phone Application?
Get to know our SIP Trunking. We have great capacity and control to integrate it with your VoIP application at very good rates. You will have quick configuration and optimal performance. Control of statistics and billing.
This SIP Trunk is compatible and verified by ViciDial, 3CX and other applications with standard VoIP.


Business Intelligence
We offer you a complete range of business intelligence services, covering all the stages to implement a BI project, from preparation, evaluation of maturity and analysis of requirements for its development. We also offer support in subsequent learning, to ensure correct adoption of the project by users.

Data Mining
We offer a complete data mining service to our clients, supporting them in the execution of their large or small data acquisition projects, thanks to the use of cutting-edge technology, which allows us to offer accurate forecasts of their businesses.

Web & Software Development
At SAS2, we create technological solutions and web applications for our clients, whether they are a startup or a company with a long history. Through the acquisition of our services, we guarantee exceptional quality throughout the entire development process, from project evaluation to maintenance and support.
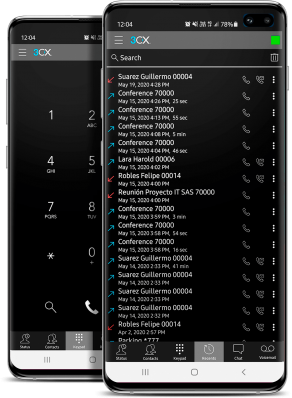
The PBX Communications Solution for the New World Reality
Has the pandemic exposed your business communications? Can your employees work productively from home using voice apps and web conferencing? Conduct remote business meetings without requiring apps? Service customer requests via website live chat? Future proof your business during the lockdown and beyond with 3CX PBX.

Call Routing System
Get to know our call tracking and lead distribution software. WIth our real time earnings-per-call buyer ranking algorithm, your company will use competition to increase your earnings per call while lowering dropped and missed call percentages, obtaining a greater number of converted leads. With CallHub, you will be able to control your lead acquisition and manage your brokers and lead buyers through a centralized call tracking platform.
Artificial Intelligence Bot Agent
Meet Call-E, our intelligent voice agent, which is able to interact naturally with humans, while creating and updating data in real time. Through Call-E, you will be able to know conversation scenarios, and also use the machine learning process resulting from interaction with your customers, to constantly improve conversational experiences with them.
Call Center Dashboard
Managing a call center requires being constantly immersed in the latest metrics, being able to reduce handling times, increase productivity and comply with service level agreements.


