
Download Smart Automation Systems 3CX SIP Trunk XML
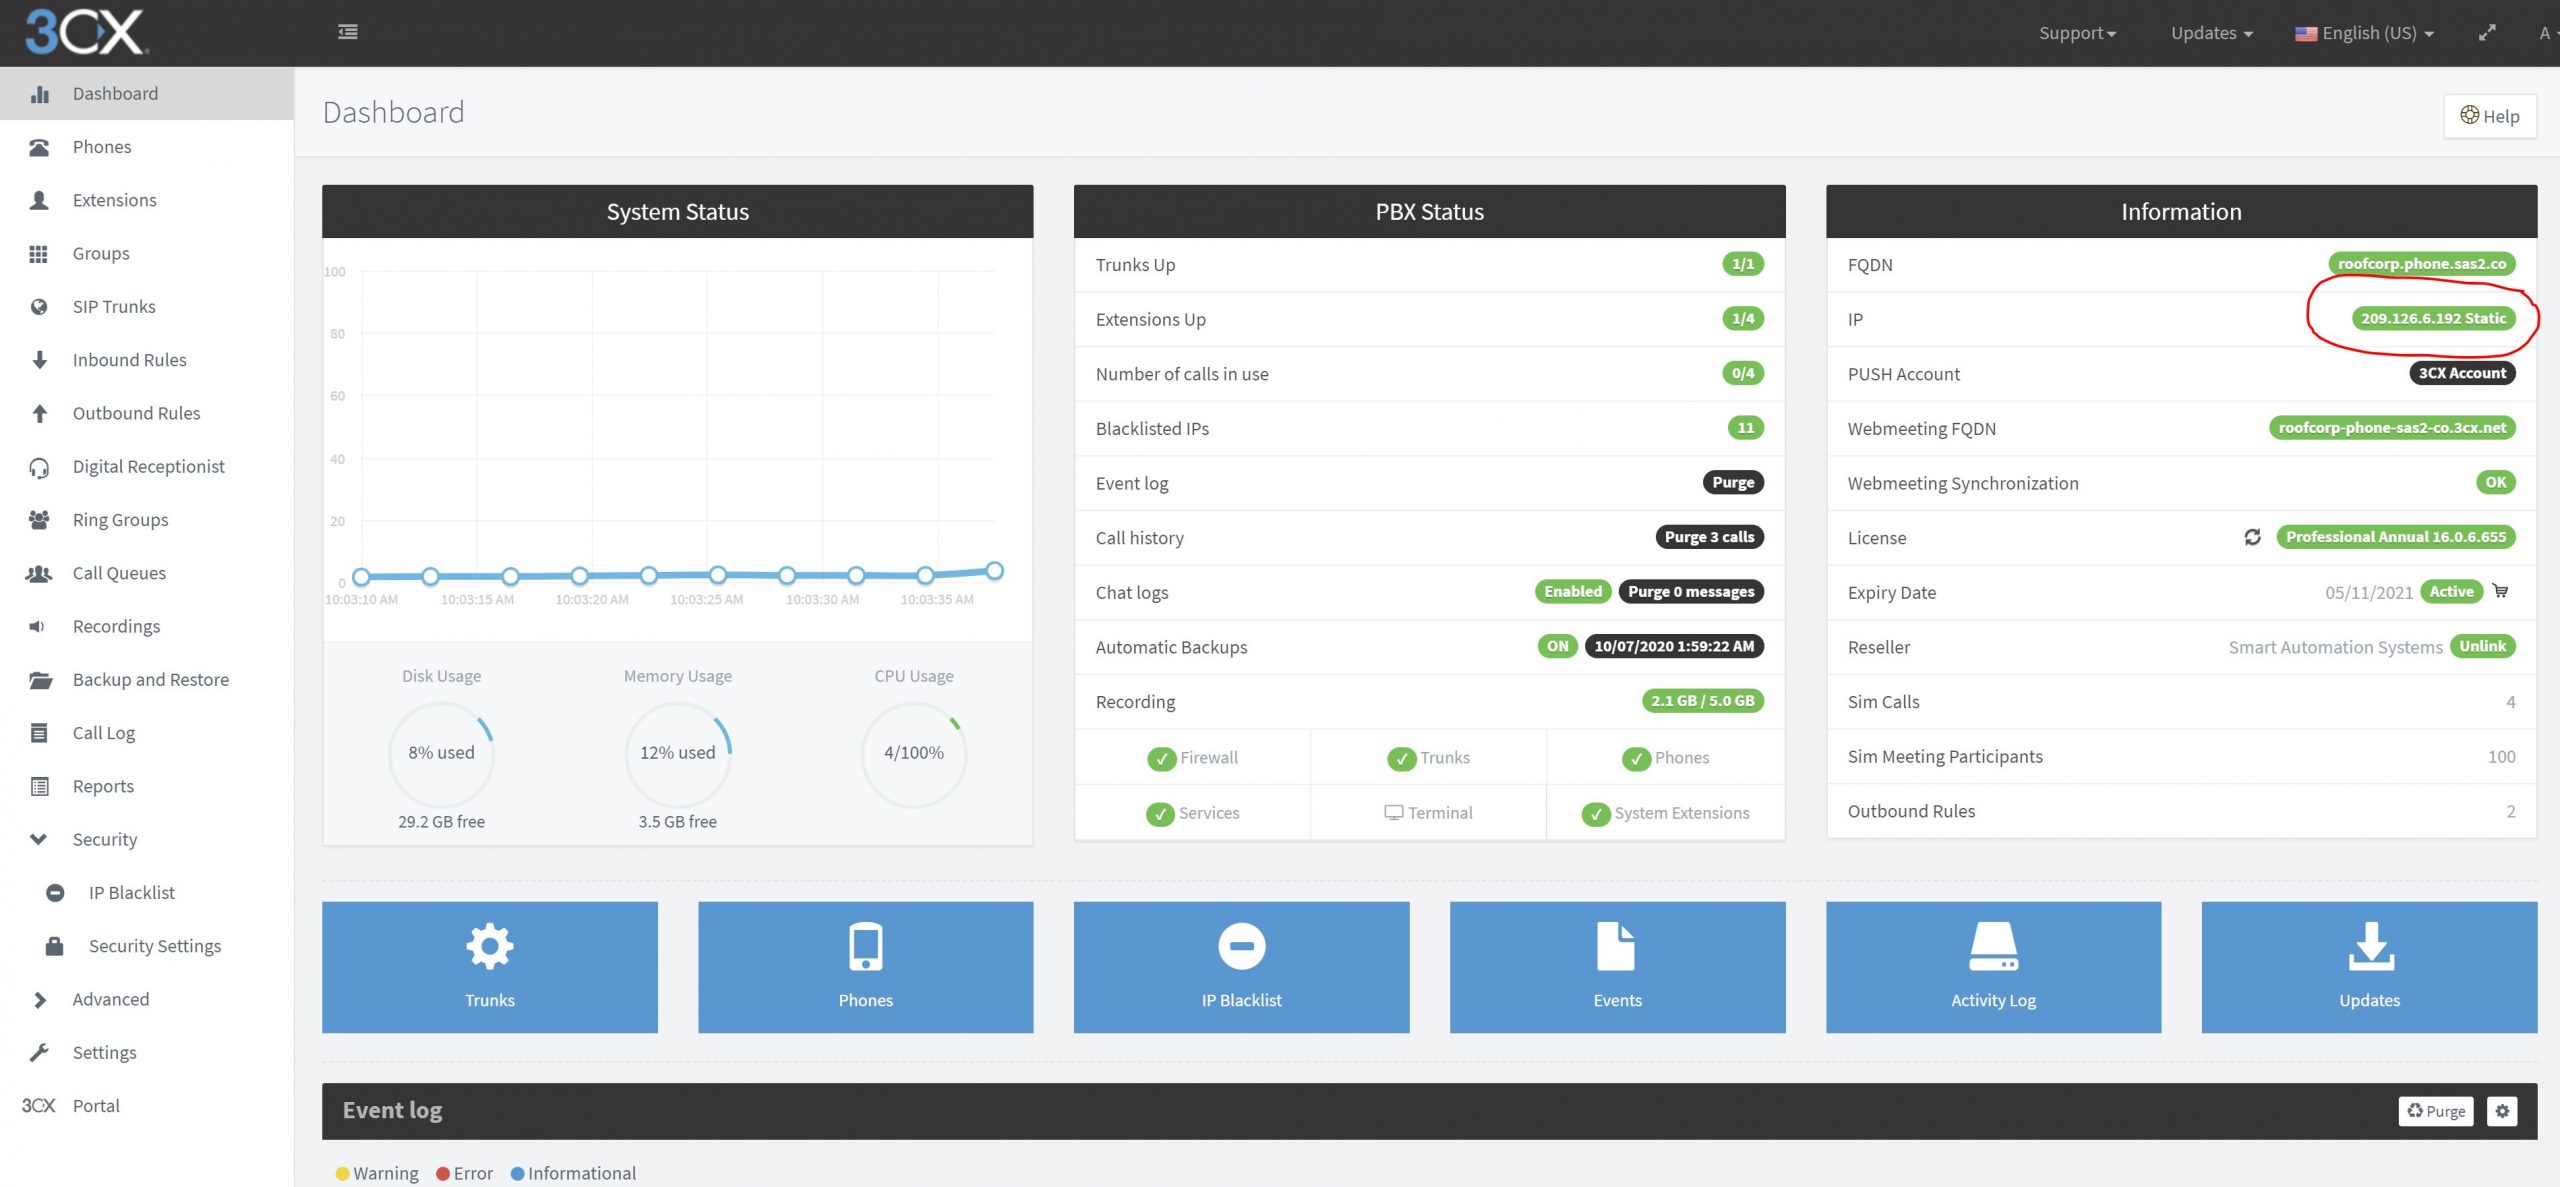
Before starting setup, you will need your 3CX PBX System IP address so log into your 3CX Management Console and you should arrive to the Dashboard Page. Save this IP address, you will need it later.
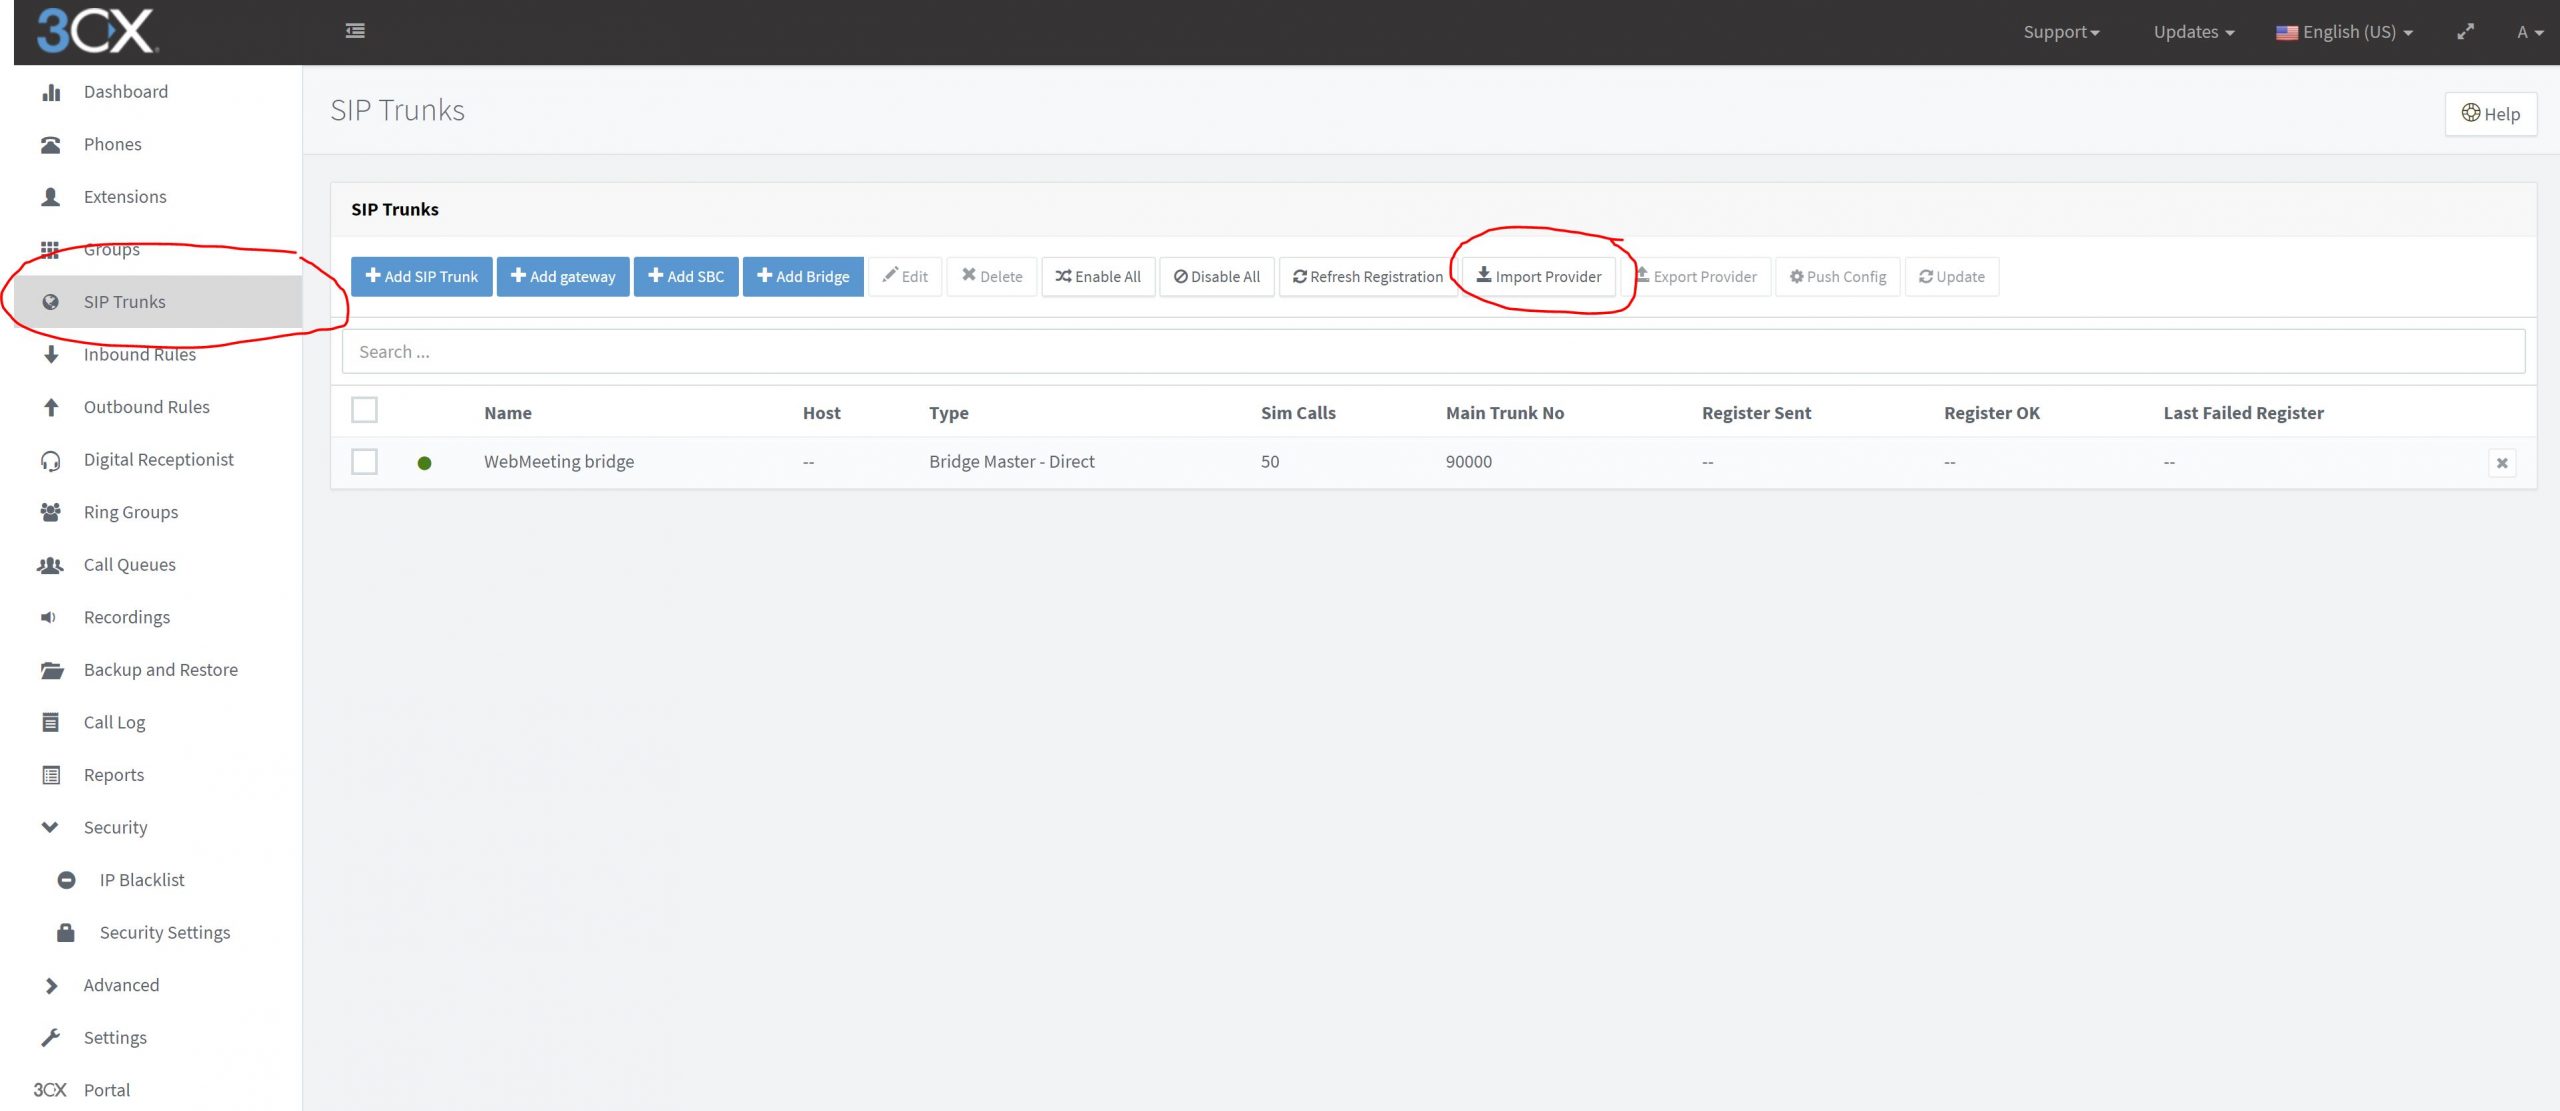
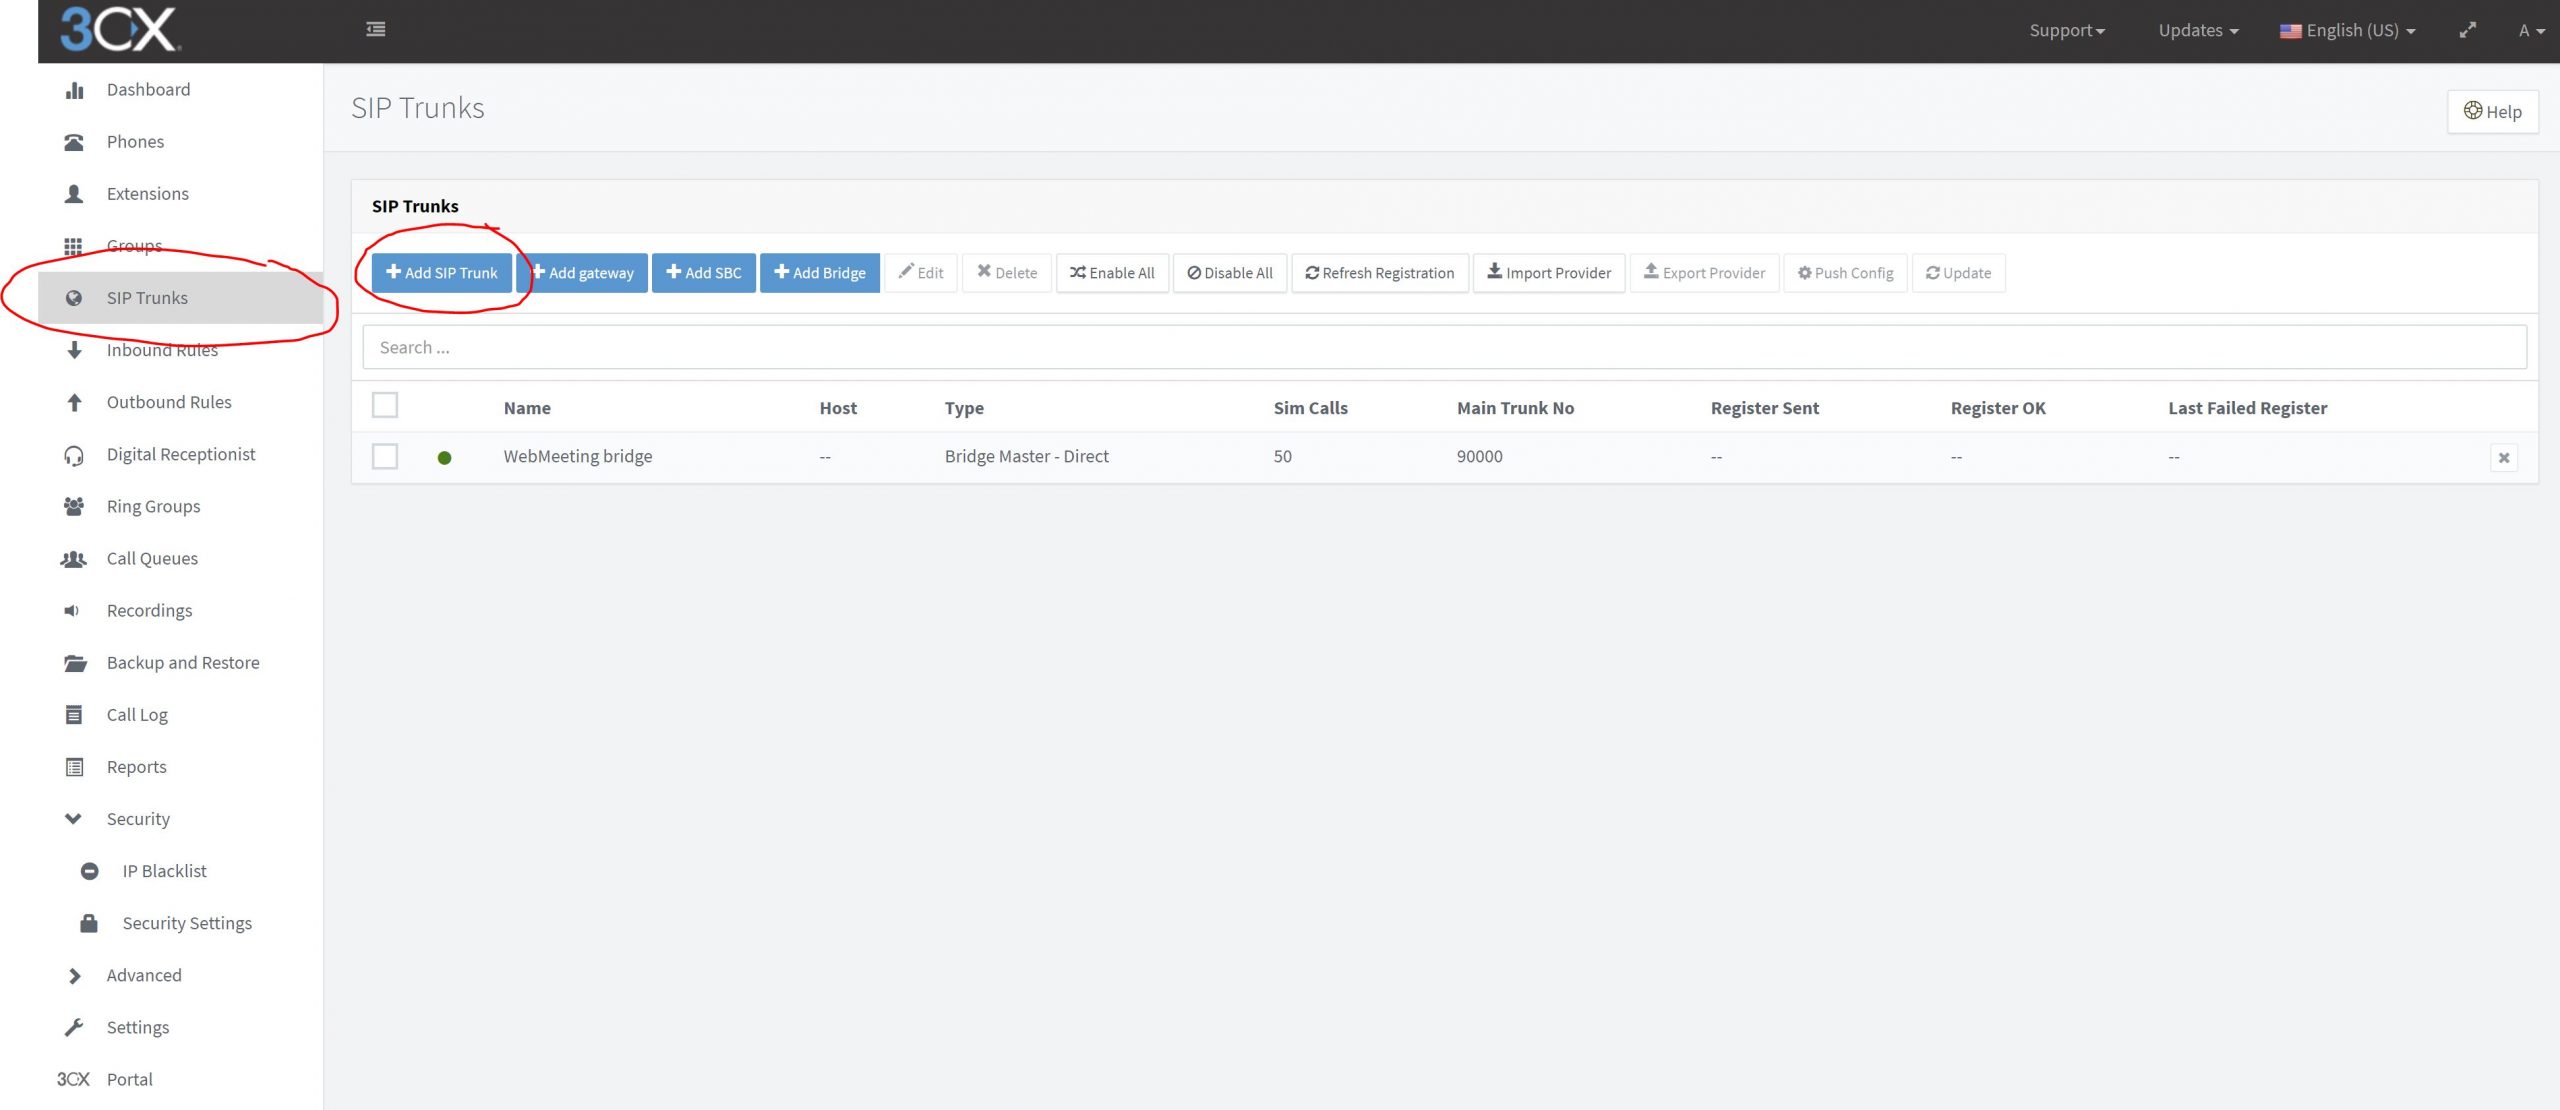
Now Select “SIP Trunks” from the Side Menu and then click the button for “Import Provider”
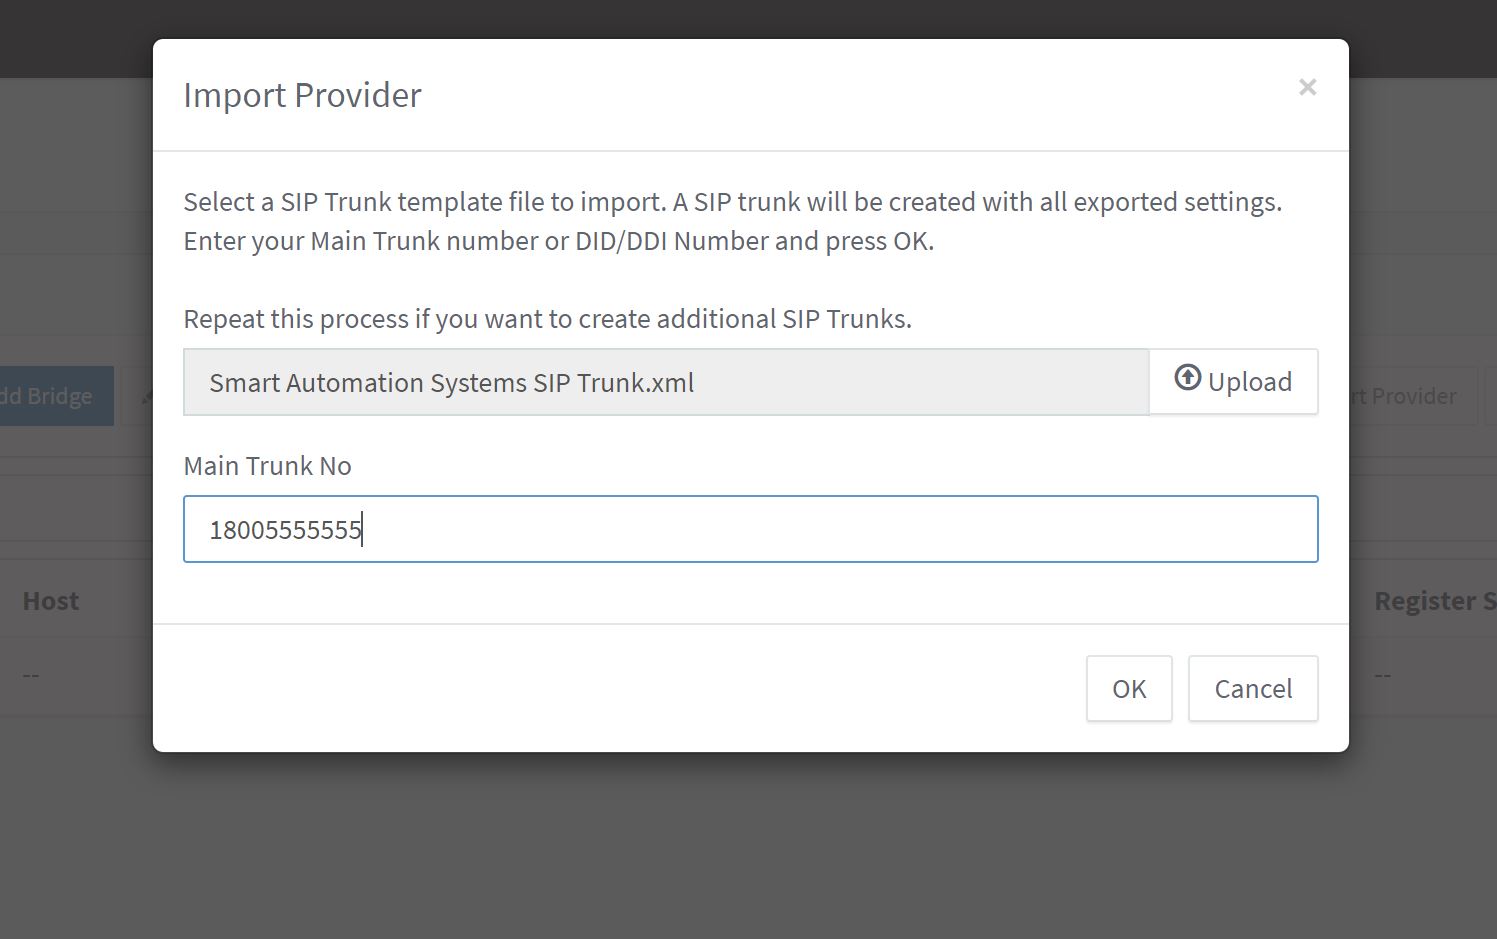
Then upload the XML file downloaded in Step one and set your default phone number. If you don’t’ have one yet, Smart Automation Systems offers Inbound DIDs for 3cx at $0.40 per month and just $0.006 per minute.
Additional numbers can be added in the DID tab if desired.
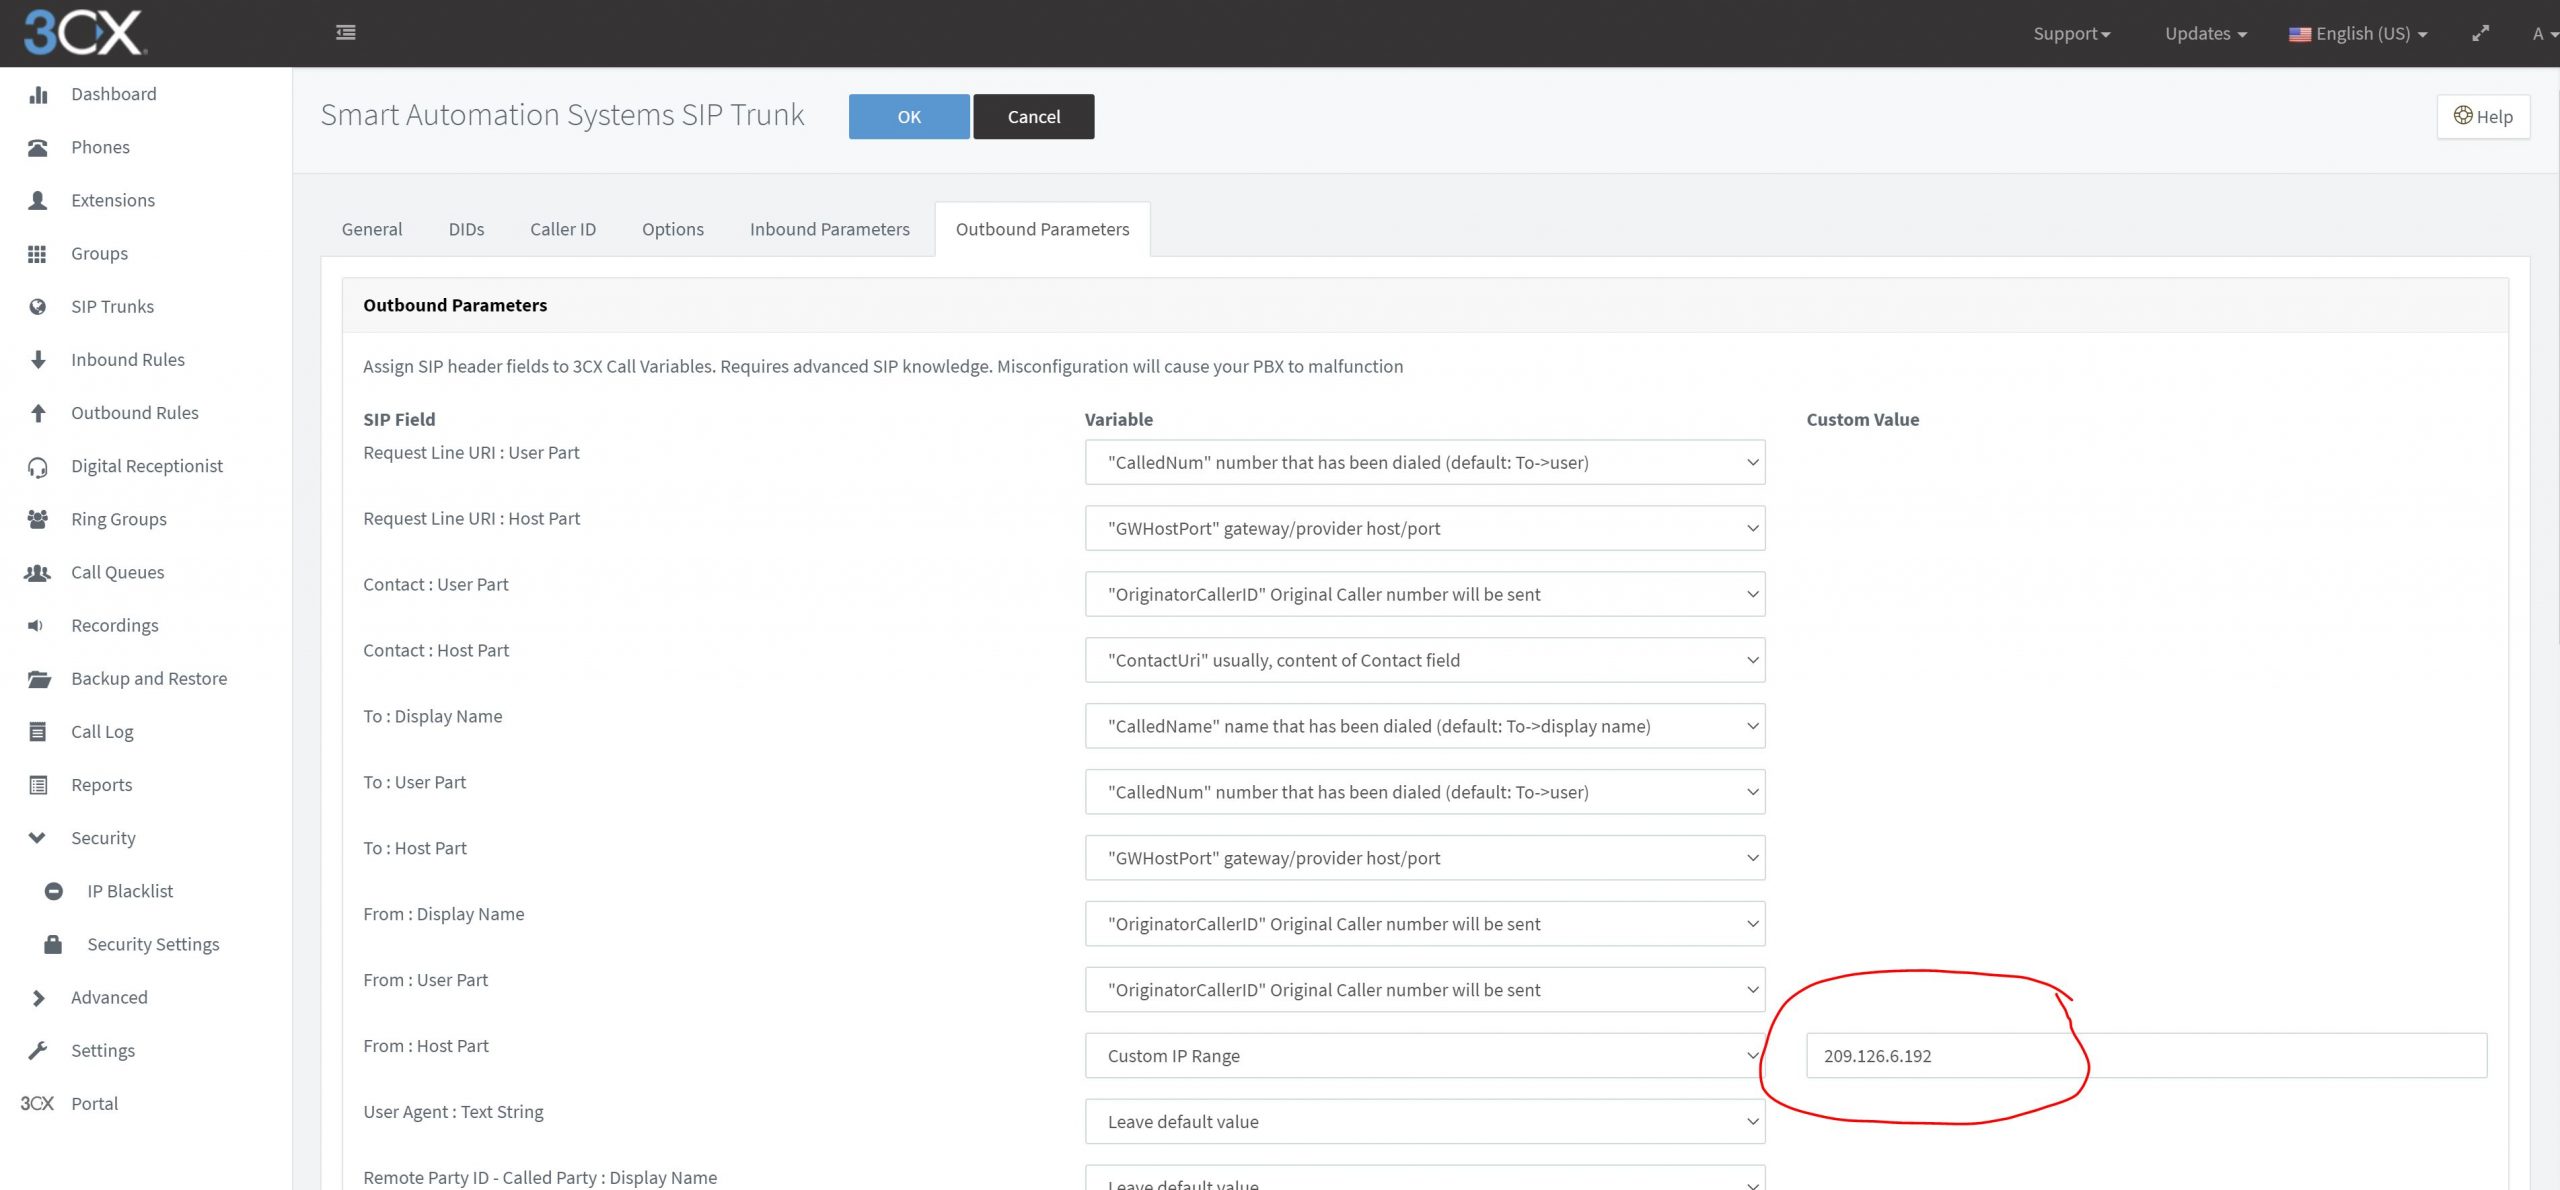
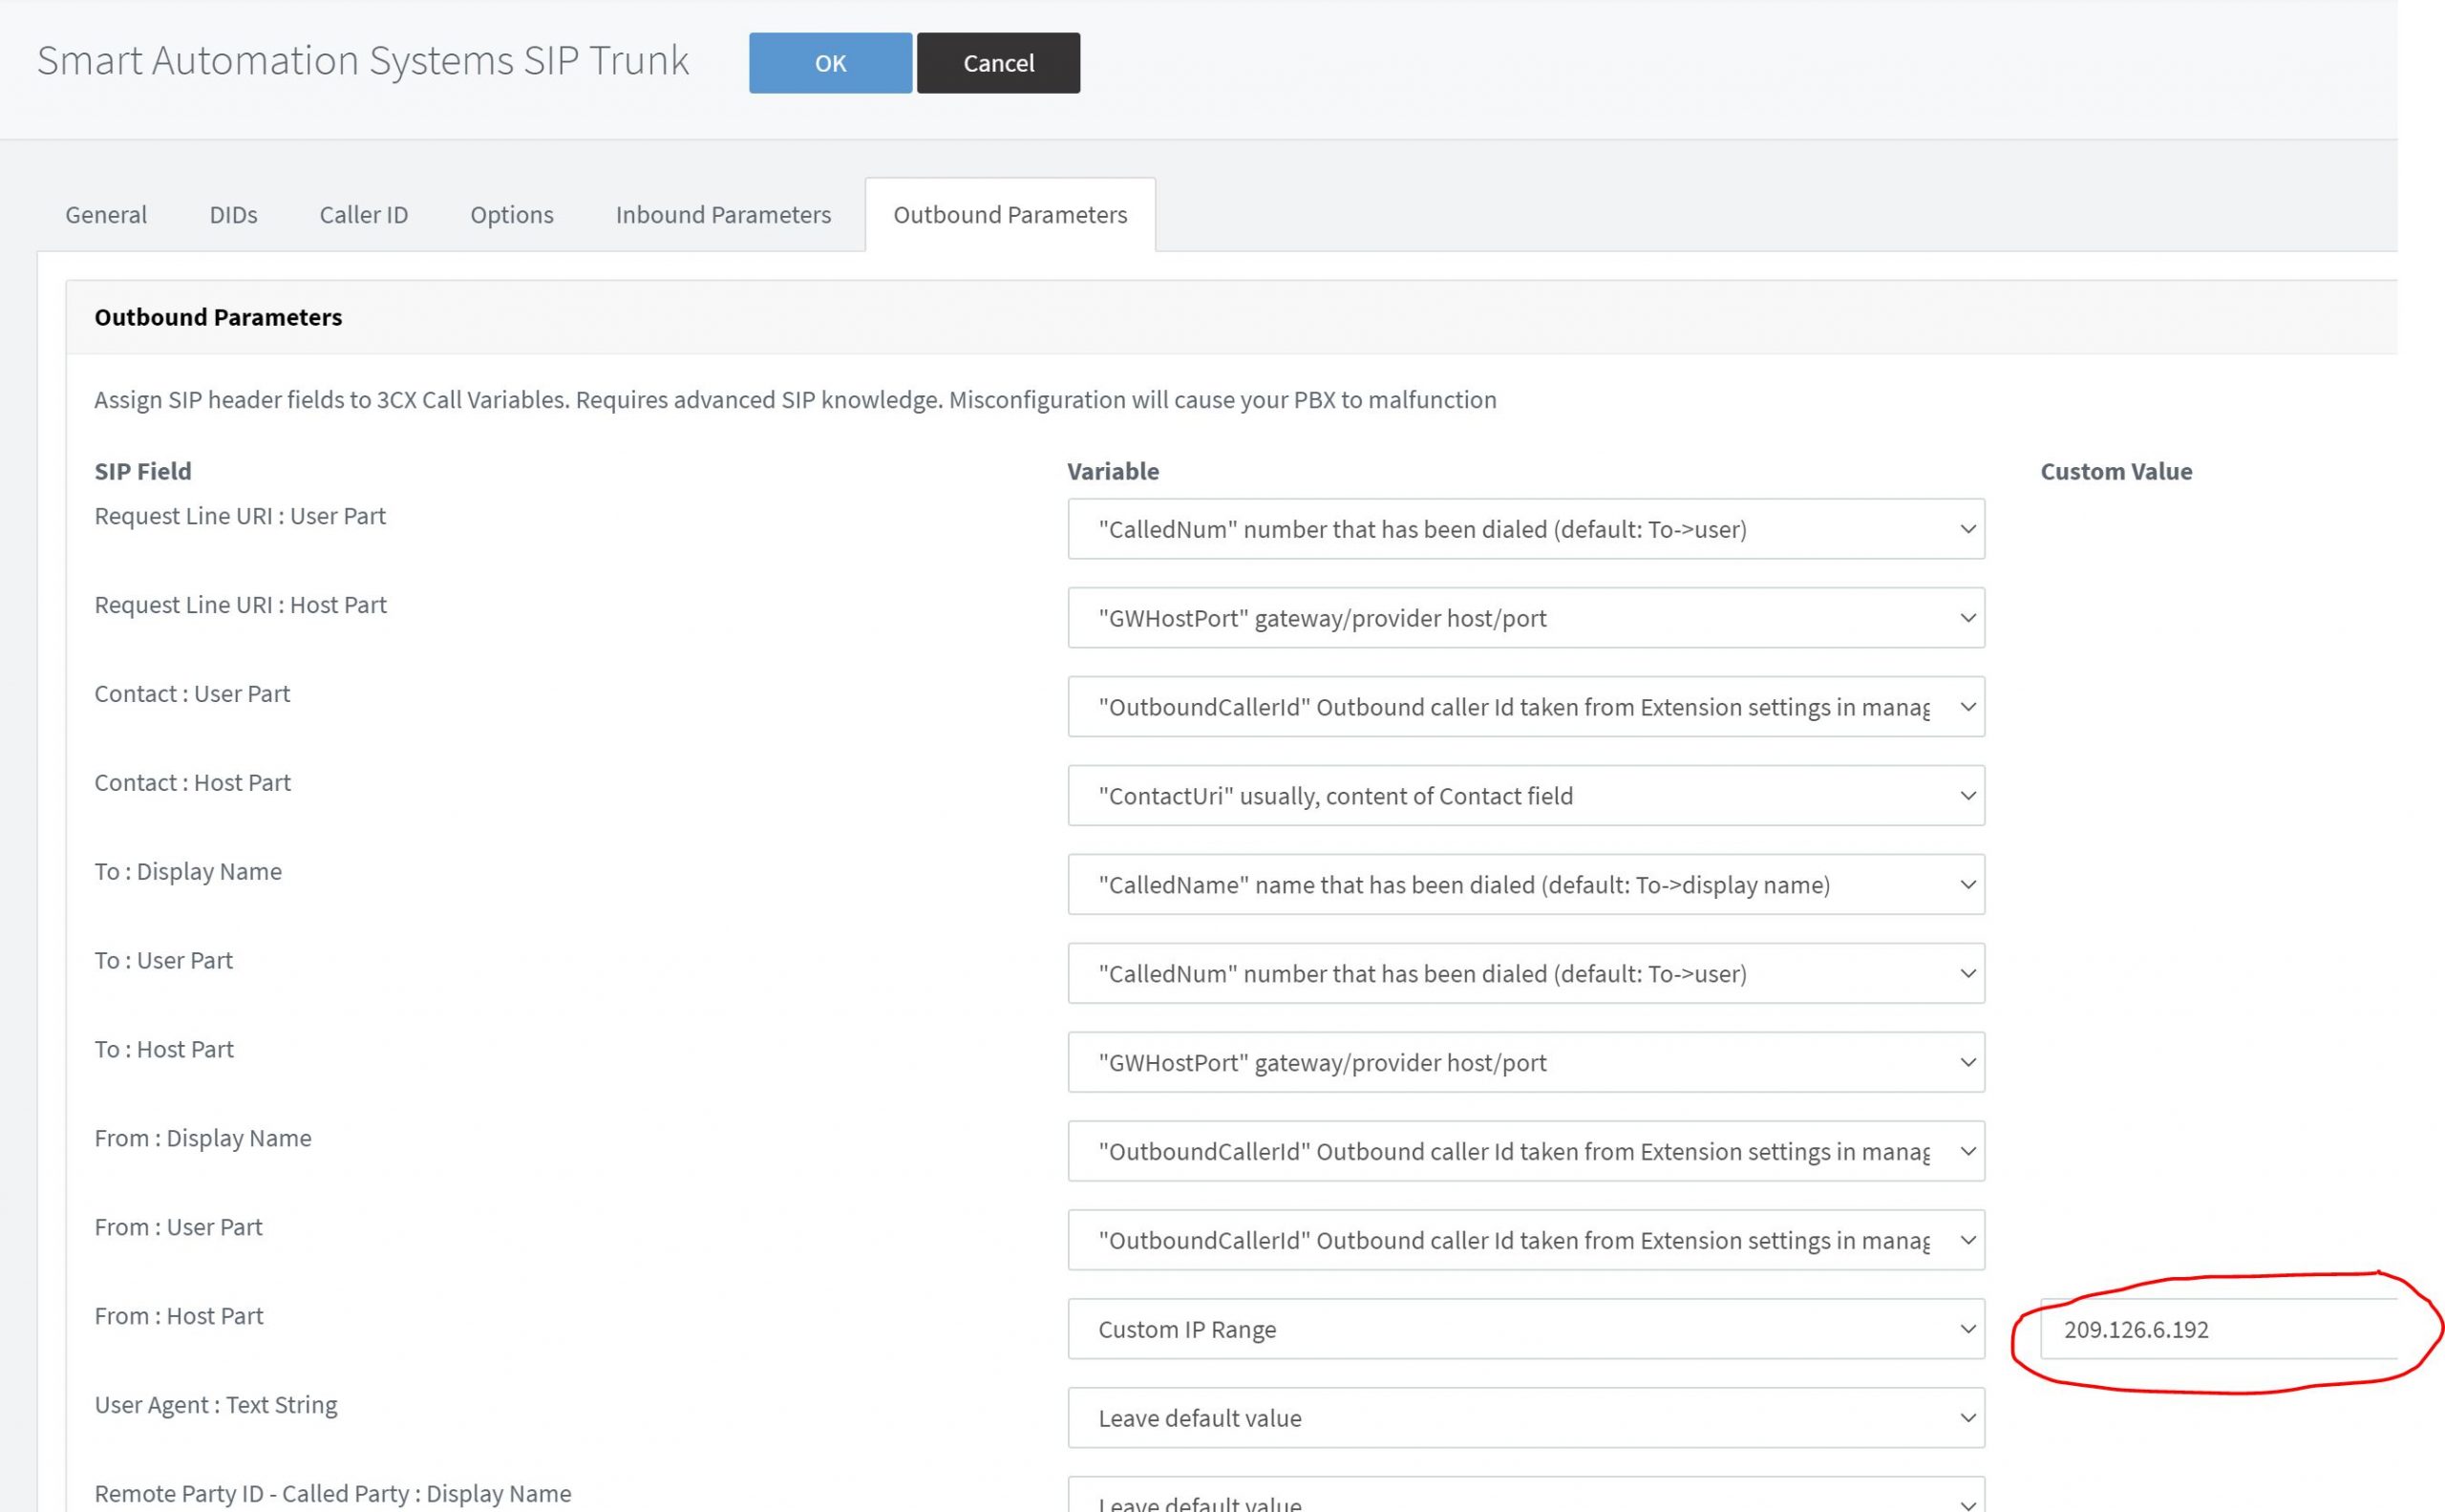
The only change to the default configuration that you will need to make is to go to the “Outbound Parameters” tab and change the “From: Host Part” custom value to the IP address of your PBX which you found in Step 2.
Click OK above to save your SIP Trunk and you’re done! [Note: Outbound calling won’t work until you setup Outbound Rules]
Just like in the Quick Setup, you will need your 3CX PBX System IP address so log into your 3cx Management Console and you should arrive to the Dashboard Page. Save this IP address, you will need it later.
Now Select “SIP Trunks” from the Side Menu and then click the button for “Add SIP Trunk”
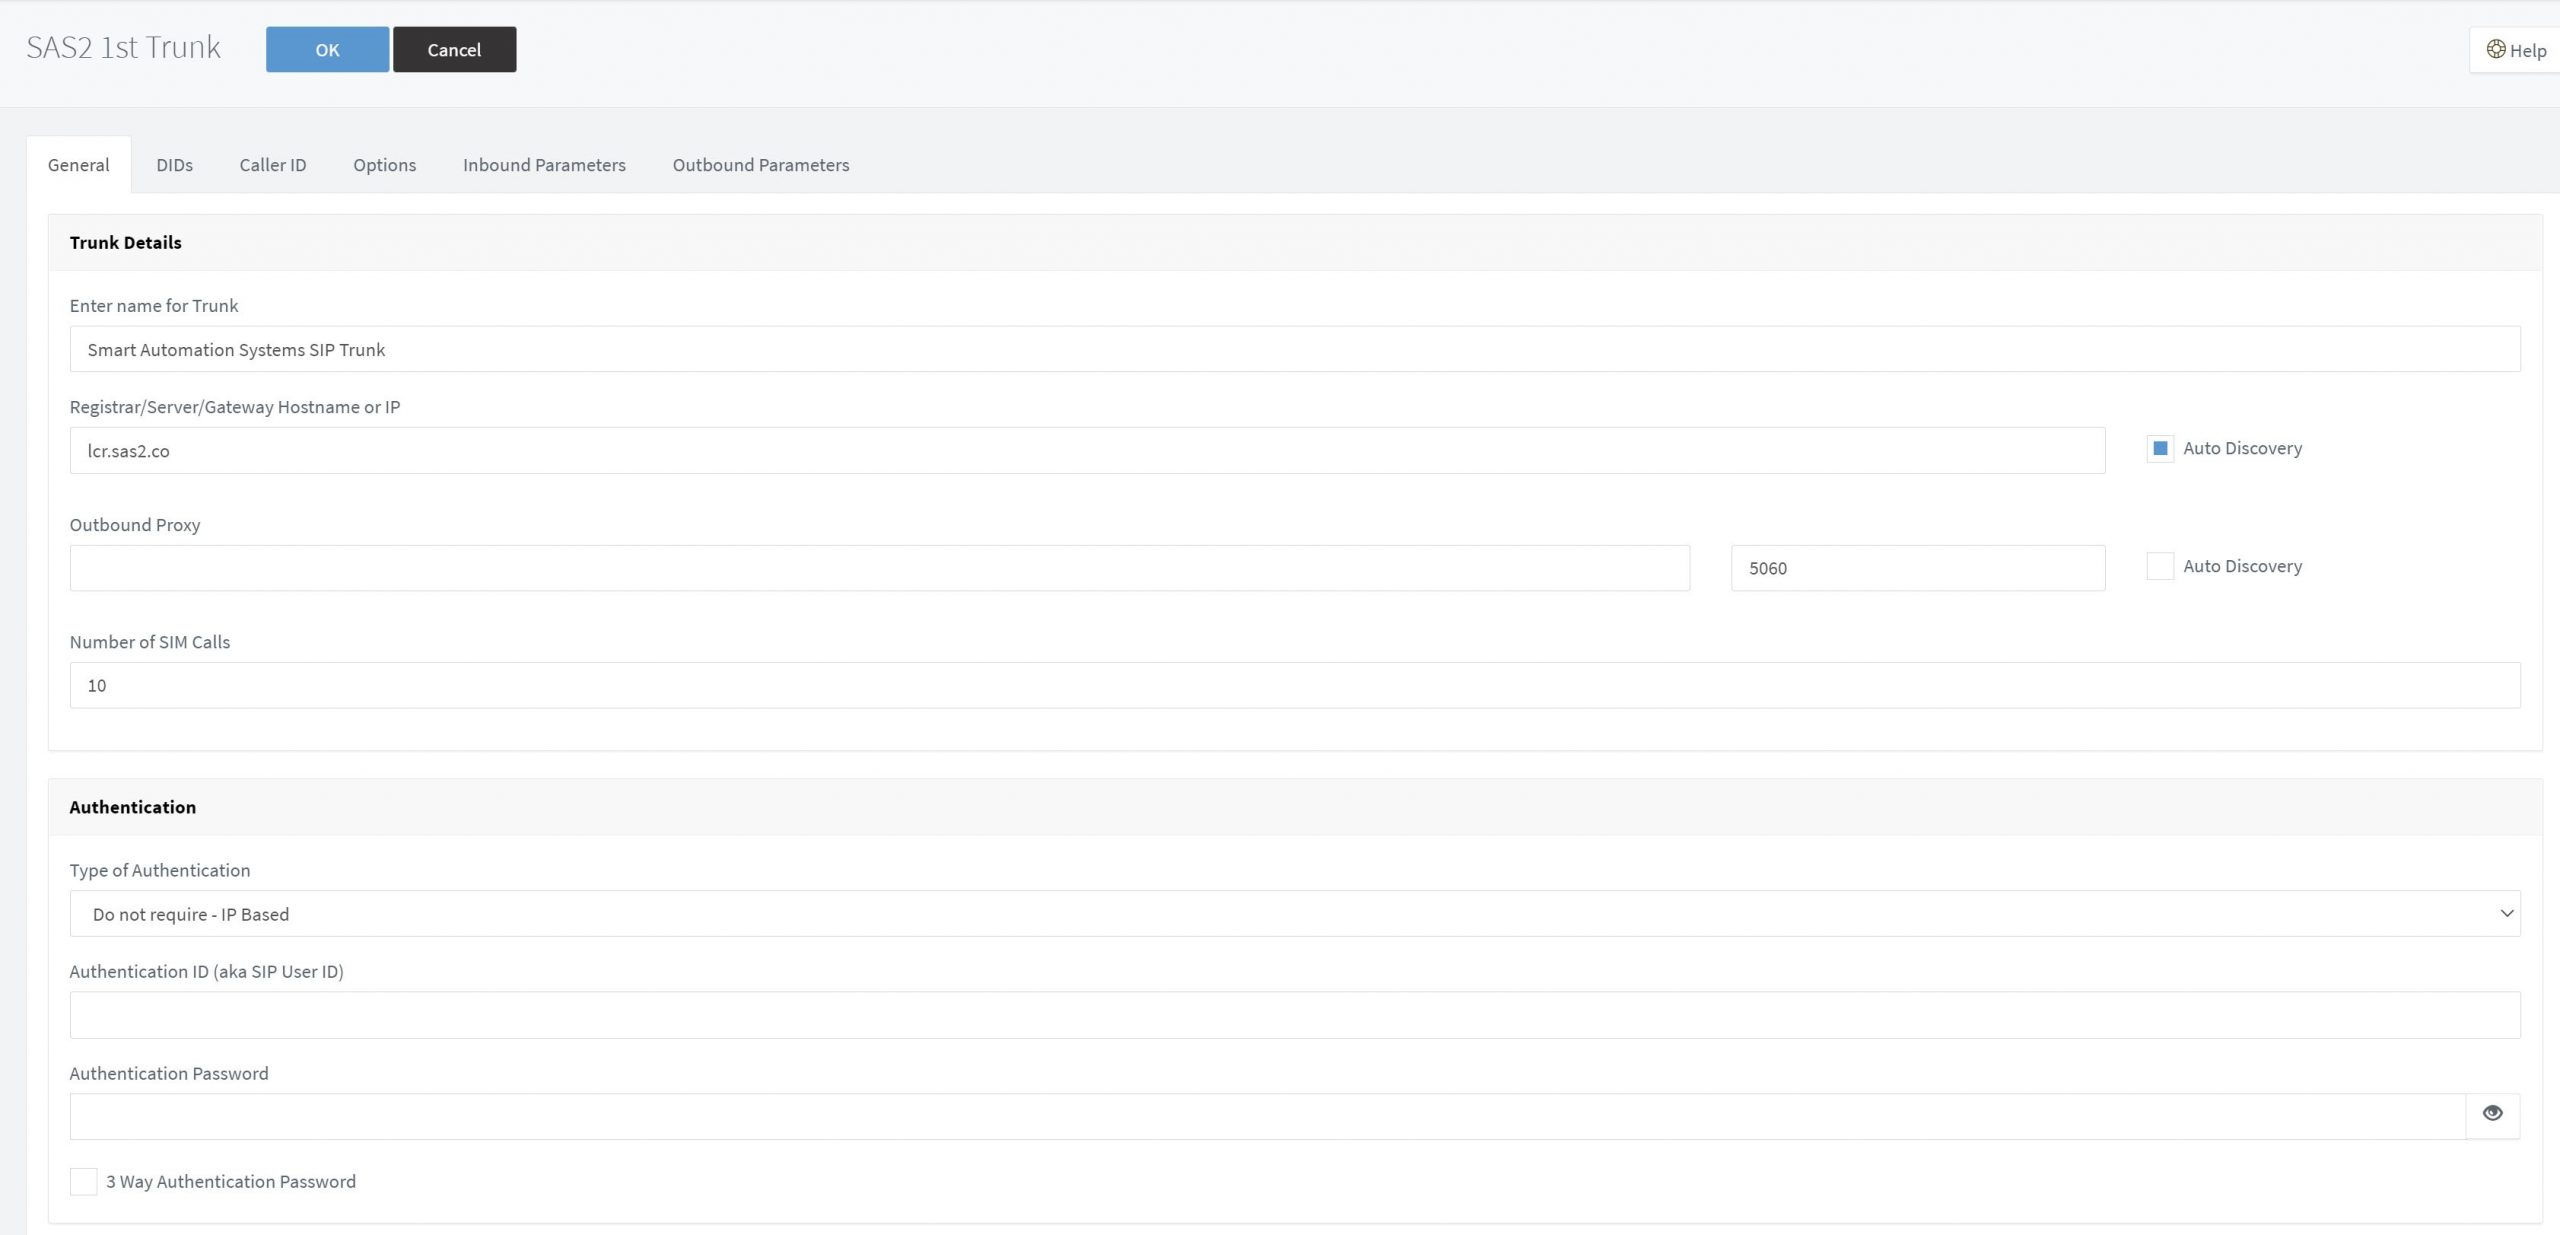
You’ll see a popup for Add SIP Trunk/VOIP Provider, for Country select “Generic”, for provider select “Generic SIP Trunk” and for Main Trunk No you will want to put your company inbound
DID or toll free number. [If you do not have one yet, please contact Smart Automation Systems and they can quickly set one up for you.] Once complete, click OK.
In Trunk Details, enter a name for your trunk and for Registrar/Server/Gateway Hostname or IP, you’ll want to enter lcr.sas2.co. Leave Auto Discovery checked and Outbound Proxy blank. Number is SIM Calls depends on your 3CX License.
Under Authentication, you can leave this as “Do not require – IP Based” as Smart Automation will already have your IP address saved and will accept all sip traffic from that IP. So you will not need to enter Authentication ID or password.
Route calls to can be selected now per your preference or at a later time.
Next, go to the Caller ID tab and enter the Caller ID you wish to appear as default for outbound calls.
Then go to the “Options” tab where you can actually leave everything as is but we would recommend unchecking “Disallow video calls”, changing “Re-Register Timeout to 120, changing
“Transport Protocol” to UDP and as our switches allow the newer and more efficient G729 codec, it’s recommended that you select that one and move it to the top (indicating priority).

Lastly, you will need to select the tab called “Outbound Parameters and go to “From: Host Part”. To the right, select “Custom IP Range” and in the Custom Value, set the IP address for your PBX system identified in step one above.
Click OK above to save your SIP Trunk and you’re done! [Note: Outbound calling won’t work until you setup Outbound Rules]